Build a React Website From Scratch: A Beginner’s Tutorial
Have you ever dreamed of creating your own website but felt overwhelmed by the technical jargon or the endless code? If so, you’re not alone! In today’s digital age, having a personal or professional website is essential, yet the thought of building one can be intimidating—especially if you’re just starting out. But what if I told you that with the right guidance and a bit of creativity, you can build a stunning React website from scratch?
In this beginner-friendly tutorial, we’ll walk you through the process step-by-step, demystifying React and empowering you to bring your ideas to life. Whether you want to showcase a portfolio, start a blog, or launch a small business, this guide will provide you with the tools and knowledge to confidently embark on your web development journey. So, grab your favorite beverage, roll up your sleeves, and let’s dive into the world of React together—your dream website is just a few clicks away!
Getting Started with React: Why It’s the Right Choice for Your Website
If you’re considering building a website, choosing the right framework is crucial. React has emerged as a leading choice among developers for several compelling reasons. First and foremost, it allows for the creation of dynamic and interactive user interfaces that enhance user experience. With React, you can build a website that not only looks good but also performs excellently under various conditions.
One of the standout features of React is its component-based architecture. This means you can break down your UI into reusable components, making your code more organized and manageable. Here are some benefits of this approach:
Reusability: Components can be reused across different parts of your application, reducing redundancy.
Maintenance: Smaller code segments are easier to maintain and debug.
Scalability: As your application grows, adding new features becomes more straightforward without disrupting existing functionality.
Performance is another area where React shines. It employs a virtual DOM that enhances rendering processes, ensuring your website remains fast and responsive. By only updating the parts of the DOM that have changed, React minimizes the workload on the browser. This performance optimization is especially beneficial for complex applications or those with high user interaction.
Ease of learning is also a significant advantage for newcomers. React’s syntax is relatively simple, especially when compared to other frameworks. Developers can quickly grasp the core concepts without feeling overwhelmed. Many resources are available, including tutorials, documentation, and community forums, making it easy to find help when needed.
Another reason to choose React is its strong community support. The framework is maintained by Facebook and a vast community of developers, ensuring that it is continuously updated and improved. You can find numerous libraries and tools that complement React, making it easier to enhance your website’s functionality without starting from scratch.
Let’s take a quick look at how React compares with other popular frameworks:
Framework
Learning Curve
Performance
Community Support
React
Easy
High
Strong
Angular
Moderate
High
Strong
Vue
Easy
Moderate
Growing
React is versatile and can be used not just for web applications, but also for mobile apps through React Native. This means that once you’ve mastered React, you can easily transition to mobile development, expanding your skill set and potential projects. With such a powerful and flexible framework at your fingertips, the possibilities for your website are endless.
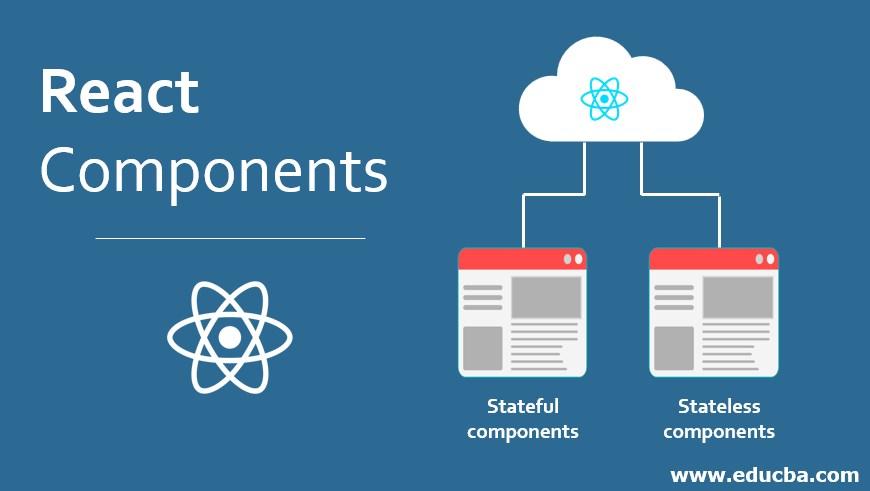
Understanding the Basics: What Are Components and Props?
In the world of React, understanding components and props is crucial for building dynamic and interactive user interfaces. Think of components as the building blocks of your application. Each component is a self-contained piece of your UI, allowing you to break down complex interfaces into manageable, reusable parts. This modularity is one of the main reasons React is so powerful and widely used.
Components can be classified into two main types:
Functional Components: These are JavaScript functions that return JSX. They are simpler and easier to read, making them a great choice for most use cases.
Class Components: These are more complex and offer additional features like lifecycle methods. However, with the introduction of hooks, functional components are becoming the go-to option for many developers.
The next key concept to grasp is props, short for properties. Props are how you pass data and event handlers between components. They allow for communication between parent and child components, enabling a dynamic flow of information.
Here’s how props work:
Props are read-only. A component cannot modify its own props, which helps to maintain a unidirectional data flow.
You can pass props to a component like this: .
Inside the component, you can access these props using props.someProp.
Component Type
Key Features
Functional
Simple, uses hooks, stateless
Class
Complex, supports lifecycle methods, stateful
One important aspect of props is that they help to keep your components reusable. For instance, if you have a button component, you can pass different props to change its appearance or behavior without rewriting the component. This not only saves time but also keeps your code DRY (Don’t Repeat Yourself).
components and props are at the heart of React’s design. By leveraging these concepts, you’ll be able to create better-organized, more maintainable code that can easily adapt as your application evolves. As you progress through building your React website, keep these fundamentals in mind, and you’ll find that they significantly enhance both your development experience and the performance of your application.
Setting Up Your Development Environment: Tools You Need to Succeed
Before diving into building your React website, it’s essential to have the right tools in place. Setting up a development environment can seem daunting at first, but with the right approach, you’ll be coding in no time. Let’s explore the must-have tools that will make your development journey smooth and enjoyable.
First on the list is a code editor. This is where you’ll spend most of your time writing code, so choose one that fits your style. Popular options include:
Visual Studio Code - Highly customizable with a plethora of extensions.
Atom – An open-source editor that’s great for collaboration.
Sublime Text – Known for its speed and minimalist design.
Next, a good version control system is crucial for tracking changes in your codebase. Git is the industry standard, and it pairs beautifully with GitHub, where you can host your repositories. This setup will allow you to collaborate with others and manage your project’s history easily.
Another essential tool is a package manager. NPM (Node Package Manager) comes bundled with Node.js, which you’ll need to run React applications. Using NPM, you can install libraries and dependencies, making your development process more efficient. Alternatively, you can explore Yarn, which offers some unique advantages, like faster installations.
Now, let’s talk about Node.js itself. This JavaScript runtime is a prerequisite for building React applications. It allows you to execute JavaScript on the server side and is essential for running build tools and development servers. Installing Node.js will also give you access to NPM, so make sure to get it on your system.
Another tool worth mentioning is Create React App. This CLI tool sets up a new React project with sensible defaults, allowing you to focus on writing code instead of configuring build settings. To get started, simply run:
npx create-react-app my-app
Additionally, consider using a browser development tool for better debugging. Most modern browsers come with built-in developer tools, but for React, the React Developer Tools extension for Chrome or Firefox is invaluable. It allows you to inspect your React component hierarchy, view props and state, and much more.
Tool
Purpose
Visual Studio Code
Code editing
Git & GitHub
Version control
NPM/Yarn
Package management
Node.js
JavaScript runtime
Create React App
Project setup
React Developer Tools
Debugging
Lastly, don’t underestimate the power of community resources. Websites like Stack Overflow, Dev.to, and the official React documentation can provide help and insight as you navigate your development journey. Engaging with these communities can also offer inspiration and tips that improve your coding skills.
Creating Your First React Component: A Step-by-Step Guide
Building your first component in React can be an exciting journey. Don’t worry if you’re new to this; we’ll take it step by step. The beauty of React lies in its component-based architecture, which allows you to break your UI into small, reusable pieces.
To kick things off, let’s create a simple functional component. Functional components are a straightforward way to create components that can be used throughout your application. Here’s how you can do it:
function Welcome(props) {
return
Hello, {props.name}!
;
}
In this example, we defined a component called Welcome that accepts props as an argument. The component returns a simple
element that greets the user by name. To use this component, simply call it like this:
Now that you know how to create a basic component, let’s add some interactivity. React allows you to manage state, which is essential for creating dynamic applications. You can use the useState hook to add state to your component:
import React, { useState } from 'react';
function Counter() {
const [count, setCount] = useState(0);
return (
<>
You clicked {count} times
);
}
In this example, the Counter component utilizes the useState hook to manage a count variable. Each time the button is clicked, the count increments, and React automatically re-renders the component to reflect the change.
As you continue to develop your React skills, you’ll want to explore more advanced concepts such as:
Props: Passing data from parent to child components.
Component Lifecycle: Understanding how components mount, update, and unmount.
Hooks: Leveraging built-in hooks for side effects and context.
Styling Components: Applying CSS to make your application visually appealing.
To keep your project organized, you might consider creating a simple folder structure:
Folder
Description
/src
Main application code and components
/components
Reusable components
/assets
Images and other media files
/styles
CSS files for styling
By following these guidelines, you’ll not only create a functional component but also set a solid foundation for your React project. Dive in, experiment, and enjoy the process of building with React!
Styling Your React Website: Choosing the Right Approach
When diving into the world of React, one of the most exciting yet challenging aspects is styling your website. With several methodologies and tools at your disposal, choosing the right approach can significantly impact your development process and the final look of your site.
First, consider your project’s scope and requirements. Different styling methods cater to various needs. Here are a few popular approaches:
CSS Modules: This approach offers scoped styles, preventing global class name conflicts. It’s perfect for modular components and helps maintain clean code.
Styled Components: Utilizing tagged template literals, this library allows you to write actual CSS within your JavaScript. It promotes a component-centric style approach, making it easier to manage styles.
Sass or LESS: If you’re already comfortable with pre-processors, Sass or LESS can be integrated to enhance your styling capabilities with variables and nesting.
Inline Styles: For quick adjustments, inline styles might come in handy. However, they lack some CSS features like pseudo-classes, so use them sparingly.
Next, think about how your styles interact with your components. Using a component-based styling approach aligns beautifully with React’s architecture. Each component can encapsulate its style, making the codebase easier to manage and understand. This leads to a more maintainable project in the long run.
To help you visualize the differences in these approaches, here’s a simple comparison table:
Styling Method
Pros
Cons
CSS Modules
Scoped styles, easy to manage
Setup required for configuration
Styled Components
Dynamic styling, theme support
Build size can increase
Sass/LESS
Powerful features, widely used
Learning curve for beginners
Inline Styles
Quick implementation, easy to modify
Lacks CSS features, less reusable
Additionally, consider responsiveness and accessibility while styling. Utilize CSS Grid or Flexbox for layout, ensuring your site looks great on all devices. Including tools like media queries in your styles will help in adapting to different screen sizes.
Lastly, remember that the choice of styling should align with your team’s skill set and the long-term vision for your project. Testing out a few methodologies on smaller components can provide insight into what works best for your workflow. Ultimately, the right styling approach is one that enhances your productivity and makes your React website visually appealing and user-friendly.
Managing State: How to Make Your Website Interactive
When it comes to building an interactive website, managing state effectively is crucial. In React, state refers to the data that determines how your app renders and behaves. It’s dynamic and can change based on user interactions, making it the backbone of user experience. Here’s how you can make your website more interactive by managing state wisely.
First, you’ll want to familiarize yourself with React’s built-in state management using the useState hook. This hook allows you to create state variables in functional components. Here’s a simple example:
const [count, setCount] = useState(0);
This code snippet initializes a state variable called count and a function setCount to update it. Whenever you want to update the count, you simply call setCount, which triggers a re-render of the component with the new state.
Next, consider using the useEffect hook for side effects, which can be critical in managing state that depends on external factors like API calls or timers. For instance, you might want to fetch data from an API when your component mounts:
useEffect(() => {
  fetchData();
}, []);
This ensures that your component stays updated with the latest data without manual intervention, enhancing interactivity.
In more complex applications, utilizing state management libraries like Redux or Context API can streamline data flow and state management across your app. This is particularly beneficial when you need to share state between deeply nested components. Here’s a quick comparison:
Moreover, implementing local state management can enhance user experience significantly. For instance, a form with controlled components can provide instant feedback to users:
By tying the input’s value to the state, you can display validation messages or dynamic updates based on user input in real-time, making your site feel responsive and engaging.
Lastly, don’t forget about leveraging context for global state management, allowing you to avoid prop drilling and simplify data sharing across your application. This is especially useful for themes, user authentication, or any other data that multiple components may need access to.
managing state in React isn’t just about making your website functional; it’s about creating an engaging and interactive experience for users. By leveraging hooks, understanding when to use external libraries, and utilizing local and global state effectively, you can build a responsive and enjoyable web application.
Routing in React: Navigating Between Pages Like a Pro
Routing in React is essential for creating a seamless user experience. By implementing a routing system, you can allow users to navigate between different components or pages without reloading the entire application. The go-to library for handling routing in React is React Router, which provides a flexible and powerful way to manage navigation in your React applications.
To get started, you need to install React Router. Open your terminal and run:
npm install react-router-dom
Once installed, you can import the necessary components in your application. The two primary components you’ll use are BrowserRouter and Route. Here’s a simple example:
import { BrowserRouter as Router, Route, Switch } from 'react-router-dom';

function App() {
  return (


  );
}
In this example, the Switch component is used to render the first Route that matches the current location. The exact prop ensures that the Home component is only rendered when the path is exactly “/”. This routing setup allows users to navigate easily between the home, about, and contact pages.
Another great feature of React Router is the ability to create nested routes. This is useful when you have components that require their own sub-navigation. Here’s a quick illustration:
This snippet shows how you can structure your routes to display a product list and individual product details based on the product ID in the URL. When users navigate to “/products/1”, they will see the details for product 1, enhancing the overall user experience.
To manage navigation programmatically, React Router provides the useHistory hook. This hook allows you to redirect users after a certain action, like submitting a form. Here’s an example:
import { useHistory } from 'react-router-dom';
const MyForm = () => {
const history = useHistory();
const handleSubmit = (event) => {
event.preventDefault();
// Process form data
history.push('/thank-you');
};
return ;
};
With the useHistory hook, you can easily guide users through your application based on their interactions. This flexibility is what makes React Router a must-have for any React developer.
mastering routing in React opens up a world of possibilities for building dynamic, multi-page applications. By effectively using React Router, you can craft intuitive navigation systems that keep users engaged. So, dive into the world of React Router and start creating a web experience that feels fluid and professional!
Using APIs: How to Fetch and Display Data in Your App
When building a React application, one of the most powerful tools at your disposal is the ability to interact with APIs. This not only allows you to fetch dynamic data but also enriches the user experience by providing real-time information. Let’s delve into how you can effectively integrate APIs into your application.
First things first – you need to choose an API that suits your project. There are countless APIs available for different needs, ranging from weather data to movie databases. Here are some popular options:
OpenWeatherMap: Perfect for fetching weather information.
The Movie Database (TMDb): Great for movie-related data.
JSONPlaceholder: A fake online REST API for testing and prototyping.
Once you’ve settled on an API, it’s time to fetch data. In React, you typically do this within a component using the useEffect hook. Here’s a simple example:
In this snippet, we’re fetching weather data from OpenWeatherMap. Make sure to replace YOUR_API_KEY with your actual API key. The component displays a loading message while fetching data and shows the temperature once retrieved.
Now that you’ve got the data, displaying it is just as crucial. You can format the output to make it visually appealing. Consider using a table to present structured information. Here’s an example of how to display weather data in a table format:
City
Temperature (°C)
Weather
London
{weather.main.temp}
{weather.weather[0].description}
Using tables can help users digest information quickly. Just ensure that your styles are consistent and align with your overall design theme.
don’t forget to handle errors gracefully. Implementing error messages will improve the user experience when something goes wrong. A simple conditional check can help you manage this:
if (error) {
return
There was an error fetching the data. Please try again later.
;
}
Integrating APIs into your React applications not only makes them more interactive but also enhances their utility. With just a few lines of code, you can transform static content into dynamic data displays that keep users engaged.
Building Forms: Capturing User Input Effectively
When it comes to capturing user input effectively in your React application, building forms is essential. Forms are not just about collecting data; they are an opportunity to enhance user experience and engagement. A well-structured form can make the difference between a user completing a task or abandoning it altogether.
To start, it’s crucial to understand the different types of input fields you can utilize. Depending on the nature of the data you wish to collect, you might want to incorporate:
Text Inputs – For single-line inputs such as names or email addresses.
Text Areas – For larger amounts of text, ideal for comments or feedback.
Select Dropdowns – To allow users to choose from a predefined list of options.
Checkboxes – Perfect for multiple selections from a set of options.
Radio Buttons – Best used when offering a single choice among several options.
Each of these input types can be easily managed using React’s state management. By leveraging the component state, you can ensure that your form collects and stores user input dynamically. Here’s a simple example:
Incorporating validation is another critical element when building forms. You want to ensure that the data submitted is not only accurate but also meets any necessary criteria. You can implement validations using simple conditional checks:
Field
Validation Rule
Email
Must be a valid email format.
Name
Cannot be empty.
Moreover, giving users immediate feedback on their input can significantly enhance their experience. Implementing real-time validation feedback through state changes can guide users toward correcting errors as they progress through the form. Using conditional rendering to show messages or highlight fields can be very effective.
Lastly, don’t forget about accessibility. Ensuring that your forms are usable for everyone, including people with disabilities, is paramount. Use proper labeling for input fields, and consider keyboard navigation and screen reader compatibility. This not only broadens your audience but also aligns with best practices in web development.
building effective forms in your React application isn’t just about technical implementation; it’s about creating a seamless user experience. From the types of inputs you choose to the validation and accessibility measures you implement, each aspect plays a vital role in ensuring users feel confident and motivated to share their information.
Testing Your React Application: Quality Assurance Made Easy
Ensuring that your React application runs smoothly and efficiently is crucial for delivering a great user experience. Thankfully, testing your code doesn’t have to be a daunting process. In fact, with the right tools and practices, it can be quite straightforward and even enjoyable!
First up, let’s talk about Jest, a delightful JavaScript testing framework designed to work seamlessly with React. Jest allows you to write tests for your components and functions with minimal setup. It’s built-in mocking capabilities and snapshot testing features make it a favorite among developers. Here are some key benefits of using Jest:
Zero configuration: Start testing with almost no setup required.
Fast and efficient: Enjoy parallel test execution, which speeds up the testing process.
Rich API: Gain access to a wide range of matchers to verify your outputs.
Next, we have React Testing Library, which focuses on testing components from the user’s perspective. Instead of testing implementation details, this library encourages you to query your components in ways that resemble how users interact with them. Some advantages include:
User-centric testing: This approach helps you identify usability issues early.
Easy-to-read tests: Your tests will be simpler and more maintainable.
Built with best practices in mind: It promotes testing best practices, making your tests more robust.
Now, let’s discuss how to set up a simple testing environment. In your React application directory, you can create a new test file for any component, for example, MyComponent.test.js. Here’s a quick example of what a test might look like:
By running your tests with npm test, you can ensure that your components are functioning as expected. Remember, the goal is to catch any bugs early in the development process, so don’t hesitate to write tests as you build your application!
To further streamline your testing approach, consider integrating Continuous Integration (CI) tools like Travis CI or GitHub Actions. These tools automatically run your test suite whenever you push changes to your repository, giving you immediate feedback on any breaking changes. Here’s a simple overview of how a CI pipeline might look:
Step
Description
1. Code Push
Developer pushes code to the repository.
2. CI Trigger
The CI tool detects the push and initiates the testing process.
3. Test Execution
All tests run automatically.
4. Feedback
Results are reported back to the developer.
By adopting these practices, you’ll not only improve the reliability of your React application but also gain confidence in your code. So, roll up your sleeves and start testing—it’s time to elevate your quality assurance game!
Deploying Your Website: Getting It Live for the World to See
After investing time and effort into building your React website, it’s finally time to unveil it to the world. Deploying a website might sound daunting at first, but with the right steps, you can make your site accessible in no time. Let’s walk through the deployment process together.
First, you’ll need to choose a hosting provider. Your choice will depend on your specific needs, such as bandwidth, storage, and scalability. Here are some popular options:
Netlify: Ideal for static sites and offers continuous deployment from Git.
Vercel: Great for React applications, with optimized performance and easy integration.
GitHub Pages: Perfect for personal projects and open-source sites.
Heroku: A versatile choice for full-stack applications with backend support.
Once you’ve selected a hosting provider, the next step is to prepare your React app for deployment. You can do this by running the build command in your terminal:
npm run build
This command creates a production-ready build of your application in the build directory. This is the version of your site that will be served to users, optimized for performance and speed.
Now that you have a build ready, it’s time to upload your files to the hosting platform. Each provider has its own method for this, but here are general steps you might follow:
Log in to your hosting account.
Create a new project or site.
Upload the contents of the build folder.
Configure domain settings if necessary.
For instance, if you’re using Netlify, you can simply drag and drop your build folder into the Netlify interface, and it will handle the rest. In contrast, with Heroku, you may need to push your code via Git. Here’s a simple command you can use:
git push heroku main
After your files are uploaded, the next step is to ensure everything is working correctly. Navigate to your domain to see your site live. It’s also a good idea to check the following:
Links and navigation are functioning.
All media loads properly.
The site is responsive across different devices.
If you encounter issues, review the console for errors or check the hosting provider’s documentation for troubleshooting tips. Don’t forget to set up any environment variables or databases if your application requires them.
Lastly, consider setting up continuous deployment. This will allow your site to automatically update whenever you push changes to your repository, saving you time in the long run. Many hosting providers offer integrations with GitHub or GitLab to facilitate this process.
With these steps, you should have your React website live and ready for visitors. Enjoy sharing your creation with the world!
Common Challenges and How to Overcome Them
Building a React website from scratch can be an exhilarating experience, but it’s not without its hurdles. Many beginners encounter common challenges that can derail their progress or leave them feeling frustrated. Addressing these challenges head-on can make the journey smoother and more enjoyable.
One major obstacle is the steep learning curve associated with understanding React’s concepts, such as components, state, and props. To tackle this, it’s essential to:
Start small: Break down your learning into manageable parts. Focus on mastering one concept before moving on to the next.
Utilize online resources: Leverage tutorials, documentation, and forums dedicated to React. Websites like React’s official documentation and freeCodeCamp are invaluable.
Practice consistently: The more you code, the more comfortable you’ll become. Try building small projects or components to reinforce your understanding.
Another common issue is managing state effectively. As your application grows, keeping track of the state can become complex. To simplify state management, consider:
Using React’s built-in hooks: Familiarize yourself with the useState and useEffect hooks, as these can help you manage state and side effects efficiently.
Exploring state management libraries: If your project requires more complex state management, libraries like Redux or Context API can be beneficial. Start by understanding their core principles before integrating them into your project.
Debugging is an inevitable part of the development process, and React applications can present unique challenges in this area. Here are some strategies to enhance your debugging skills:
Utilize browser developer tools: Familiarize yourself with the React Developer Tools extension for Chrome or Firefox. It allows you to inspect component hierarchies and props.
Error boundaries: Implement error boundaries in your components to catch and handle errors gracefully, ensuring that your application remains functional even when issues arise.
Lastly, integrating third-party libraries can be daunting due to compatibility issues and learning new APIs. To navigate this smoothly:
Research library documentation: Before integrating a library, read its documentation thoroughly to understand its purpose and how to use it effectively.
Check for compatibility: Ensure that the library is compatible with the version of React you’re using to prevent conflicts.
Start with popular libraries: Begin with well-documented and widely-used libraries, as they often have a larger community for support and troubleshooting.
Challenge
Solution
Steep Learning Curve
Start small and use online resources.
State Management
Use hooks or explore state management libraries.
Debugging
Utilize developer tools and error boundaries.
Integration of Libraries
Research documentation and ensure compatibility.
By recognizing these challenges and implementing practical solutions, you’ll not only enhance your skills but also gain the confidence to build your React website from the ground up. Remember, every seasoned developer was once a beginner, and persistence is key to success.
Resources for Continuous Learning: Stay Ahead in React Development
As you embark on your journey to build a React website from scratch, it’s essential to equip yourself with the right resources. Continuous learning is the key to staying relevant in the fast-evolving landscape of web development. Here’s a curated selection of tools, platforms, and communities that can enhance your React skills.
Online Learning Platforms:
Udemy: Access a wide range of affordable courses focusing on different aspects of React, from beginner to advanced levels.
Pluralsight: Offers tech-focused courses that are updated regularly to reflect the latest trends and advancements.
Frontend Masters: Dive deep into expert-led workshops that cover everything from basic React concepts to complex state management.
React Tutorial: An interactive guide to help you grasp the fundamentals by building a simple game.
React Community: Connect with fellow developers, seek help, and share knowledge.
Books to Consider:
Book Title
Author
Focus Area
Learning React
Alex Banks & Eve Porcello
Fundamentals
React Up & Running
Stoyan Stefanov
Practical Application
The Road to React
Robin Wieruch
Project-Based Learning
Community and Forums:
Stack Overflow: A treasure trove of questions and answers where you can find solutions to common React problems.
Reddit - r/reactjs: A vibrant community for discussions, tips, and sharing projects.
DEV Community: A platform for developers to share articles, tutorials, and experiences related to React.
don’t forget to experiment and build projects of your own. The best way to solidify your knowledge is through practice. Join hackathons, collaborate with peers, or contribute to open-source projects. With these resources at your fingertips, you’ll be well on your way to mastering React and creating amazing web applications!
Join the Community: Benefits of Networking with Other React Developers
Connecting with other React developers opens up a world of opportunities that can significantly enhance your coding journey. By joining a community, you immerse yourself in an environment rich with knowledge and experience that can accelerate your learning curve and boost your confidence. Imagine having a network of enthusiastic developers at your fingertips, eager to share insights and tips that can help you solve problems more efficiently.
One of the most valuable aspects of networking is the exchange of ideas. Every developer has a unique perspective and approach to problem-solving. Engaging with others allows you to:
Discover new tools and libraries that can streamline your projects.
Learn different coding styles and methodologies that enhance your own skills.
Get feedback on your code, helping you to grow as a developer.
Moreover, networking can lead to collaboration opportunities. Whether it’s working on open-source projects or starting a side hustle, collaborating with others can not only bolster your portfolio but also provide you with real-world experience. By participating in hackathons or coding challenges, you can team up with fellow developers, allowing you to learn from each other while creating something amazing together.
Networking isn’t just about enhancing technical skills; it can also aid in career growth. Building relationships within the community can lead to job referrals and insider information about job openings that may not be advertised publicly. Having a strong network can give you an edge over other candidates, as employers often favor recommendations from trusted sources.
Participating in meetups and online forums can introduce you to mentorship opportunities. Finding a mentor who has walked the path you’re on can provide invaluable guidance. Their insights can help you navigate challenges you might face as you start your career. Likewise, mentoring others can reinforce your own knowledge and improve your communication skills.
To illustrate the numerous benefits of networking, take a look at the following table that highlights key advantages:
Benefit
Description
Knowledge Sharing
Access to a wealth of resources and learning materials from peers.
Collaboration
Opportunities to work on joint projects and learn from others.
Career Advancement
Job leads and professional connections that can help you grow.
Mentorship
Guidance from experienced developers to help you progress.
being part of a community fosters a sense of belonging and motivation. When you see others achieving their goals, it can inspire you to push through your obstacles. The camaraderie that comes from shared experiences can be a powerful motivator as you build your React website from scratch.
Frequently Asked Questions (FAQ)
Q&A: Build a React Website From Scratch (A Beginner Tutorial)
Q: Why should I learn React? A: Great question! React is one of the most popular JavaScript libraries out there, and for a good reason. It allows you to build interactive and dynamic user interfaces with ease. Plus, knowing React opens up a world of opportunities in web development jobs. It’s widely used by top companies like Facebook, Instagram, and Airbnb, so learning it can really boost your resume!
Q: Is this tutorial suitable for complete beginners? A: Absolutely! This tutorial is designed with beginners in mind. We’ll start from the basics and progressively build your skills. Even if you’ve never written a line of code before, by the end of this guide, you’ll be able to create your very own React website!
Q: What do I need to know before starting? A: While prior experience in HTML, CSS, and JavaScript is helpful, it’s not strictly necessary. We’ll cover key concepts along the way. Just bring your enthusiasm and willingness to learn!
Q: How long will it take to complete the tutorial? A: The beauty of this tutorial is that you can go at your own pace. If you dedicate a few hours each week, you could be up and running in a couple of weekends. The key is consistency—so try to set aside some time regularly to practice!
Q: Will I be able to create a fully functional website by the end? A: Definitely! By following this tutorial step-by-step, you’ll create a fully functional website complete with all the essential features. You’ll learn how to manage components, handle state, and even make your website responsive!
Q: What tools or software do I need to get started? A: You’ll need a code editor (like Visual Studio Code), Node.js, and a web browser. Don’t worry if you’re not familiar with these tools; we’ll walk you through the installation and setup process.
Q: I’ve heard React has a steep learning curve. Is that true? A: It can seem that way at first, but with this tutorial, we break down complex topics into digestible parts. Once you grasp the fundamentals, you’ll see that React becomes easier and more intuitive. Plus, the community is incredibly supportive, so resources and help are just a click away!
Q: Can I use this knowledge for something other than web development? A: For sure! While this tutorial focuses on web development, the skills you learn with React can be applied in mobile app development (using React Native) and even in building desktop applications. It’s a versatile skill that pays off!
Q: What if I get stuck during the tutorial? A: Don’t worry! It’s completely normal to hit a bump in the road. The React community is vast and helpful. You can reach out in forums or even revisit sections of the tutorial. Remember, every great developer has faced challenges, and overcoming them is part of the learning process!
Q: What’s the next step after completing this tutorial? A: Congratulations on your soon-to-be accomplishment! After this tutorial, you can dive deeper into advanced React concepts, explore related libraries (like Redux for state management), or even start building your portfolio. The possibilities are endless!
Q: How do I stay updated with React news and updates? A: That’s a smart move! Follow React’s official blog, join community forums, and subscribe to newsletters. Engaging with the community on platforms like Twitter or Dev.to can also keep you informed about the latest trends and best practices.
Q: Why is now the perfect time to start learning React? A: The demand for React developers is booming! With companies continually looking for skilled developers to create amazing user experiences, now is the best time to jump in. Plus, with so many resources available, including this tutorial, there’s no better moment to start your journey!
So, are you ready to embark on this exciting journey of building your React website from scratch? Let’s get started and create something amazing together!
In Retrospect
And there you have it! You’ve taken your first steps into the exciting world of web development by building your very own React website from scratch. It might feel like a lot to take in at first, but remember, every expert was once a beginner.
Now that you’ve got the basics down, the real fun begins. Keep experimenting, keep building, and don’t be afraid to dive deeper into React’s more advanced features. There’s a whole community out there just waiting to support you, so don’t hesitate to reach out and share your journey!
If you’ve found this tutorial helpful, consider sharing it with friends who are also looking to jump into web development. And hey, why not start a new project or two? The best way to solidify your skills is through practice, practice, practice!
Thanks for joining me on this adventure. I can’t wait to see what you create next. Happy coding!